
I’ve been watching my backyard now for a couple of years. I was relatively certain, if I waited long enough, workers would come in the night and revamp the whole place. Well, after yet another morning of disappointment waking up to the same dirt and dying grass I realized this may be up to me to rectify. That being said, with two kids in private school and a 15 year old cat that has not gone more than 5 minutes without emptying a bowl of food, I realized this was going to be a financial challenge. Hence backyard on a budget.
Assessment
I had a few problems, aside from cash flow. I don’t really know much about yard work. I tend to avoid the sun, no comments about my choice of life venue please. The first thing I decided was that I was done looking at the far side of our yard. The gardener had already replaced the sod at least twice in as many years and, after I tried to step up the watering, the fat cat came in with a fish from somewhere out there but, the now swamp grass was still brown and dying. So, the grass was going first. Spent the day tearing that out and attempting to kill any stragglers without using pesticides. I have two fruit trees in the middle and I was not thrilled about a RoundUp solution. Being an IT guy by trade, you can see my hands are not used to working for a living:

Here I go
Funny thing, once you tear a large area of grass out of your yard, no matter how bad you thought it looked, you create a bit of a situation. That is to say, when your Wife, who’s privy to your zeal for yard work AND has seen a few of your projects go awry, notices you’ve pretty much decimated the place…Well, that can be a situation. Side bar about the word decimated: Just yesterday my Son was explaining the origin of the word to me. Not sure why, I used it in a sentence about something and off he went. I had never heard the story, so I looked it up. Interesting story, he has a lot of those, Squirrel! You can read about it here: http://en.wikipedia.org/wiki/Decimation_%28Roman_army%29
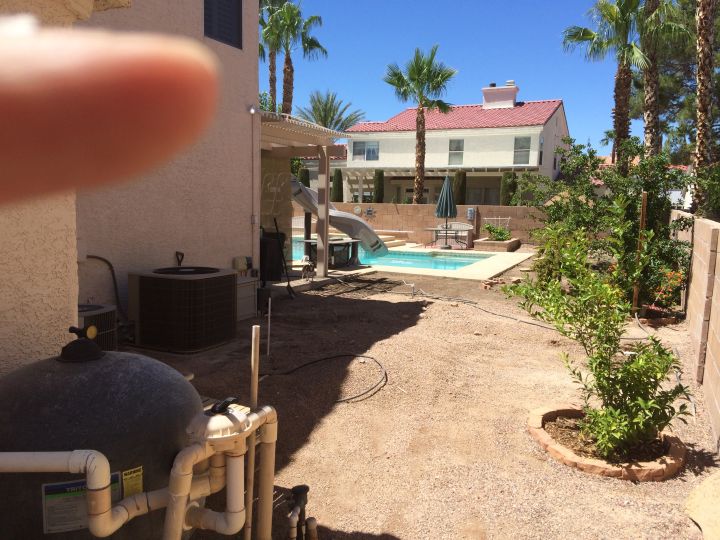
Once the grass was out, my tendencies to obsess kicked in and I got a little over enthused. Half-finished things tend to make my skin itch, but that could have just been the stuff I was digging up in the yard. I felt like I’d like to pour a cement slab and possibly put up a gazebo. My Wife had been to a friend’s recently and really liked how their gazebo was setup. Well, you don’t need any money to get ready for a cement slab so, up with the sleeves. I dug trenches from one side of that area to the other and buried some ¾†PVC for sprinklers (1 extra as a spare). I also dug a trench so that I could run conduit and power to the Gazebo for lights…Ha! who am I kidding, I wanted to power my laptop out there. If you’ve never had the pleasure of digging in Southern Nevada you’re really missing out. About 10″ down you hit what I’m told is caliche. I think this is a fancy name for a 12″ layer of steel, left out of the science books, between the crust and the mantel. Once I had that done, I thought it would be cool to add another ½†PVC for misters around the gazebo. A few weeks before, I had built a mister system out of ½†PVC around the patio cover and figured I could just plumb into that. I set those misters up on a sprinkler valve and controlled it with a Z-Wave setup (more about that later). I measured 13′ away from the power conduit because I was looking at 10′ X 13′ Gazebos. You can see that here, the two red arrows point to the conduit sticking up. Click the images for a larger view:

I routed PVC all the way around anywhere I thought I would want to run sprinklers later. I picked up 8 brand new sprinkler valves with solenoids, on Craig’s List, from an old retired Navy guy in Henderson. My bar-tending days come back to me and I end up chatting with people I buy stuff from (That is, if they’re not petrified that there’s someone in their house and praying I just leave without tying them up and stealing their car). I had no idea how to hook them up (the sprinkler valves, not the tied up people…not that I have people tied up, but I digress). I wasn’t too worried, University of Youtube never disappoints.
On the other side of the yard, I decided to cut my teeth on growing something we could eat (probably have to wrestle it away from the fat cat but that’s pretty much every thing edible around here anyway). This was my first venture into sprinklers, drippers actually. One thing I learned, if you don’t do something to regulate the pressure on a drip system, you’ll be blowing lines off all over the place. You have not lived until one of those blows off, finds it’s way to your eyeball like a laser guided smart bomb and mixes with the sweat running down your forehead. Did I mention, I usually avoid the sun? So, yeah, a pressure regulator. Couple of bucks and it works wonders. You can see from the flowing water I didn’t botch it completely:

Fruits (cough) of my labor:


Back to the ugly side of the yard
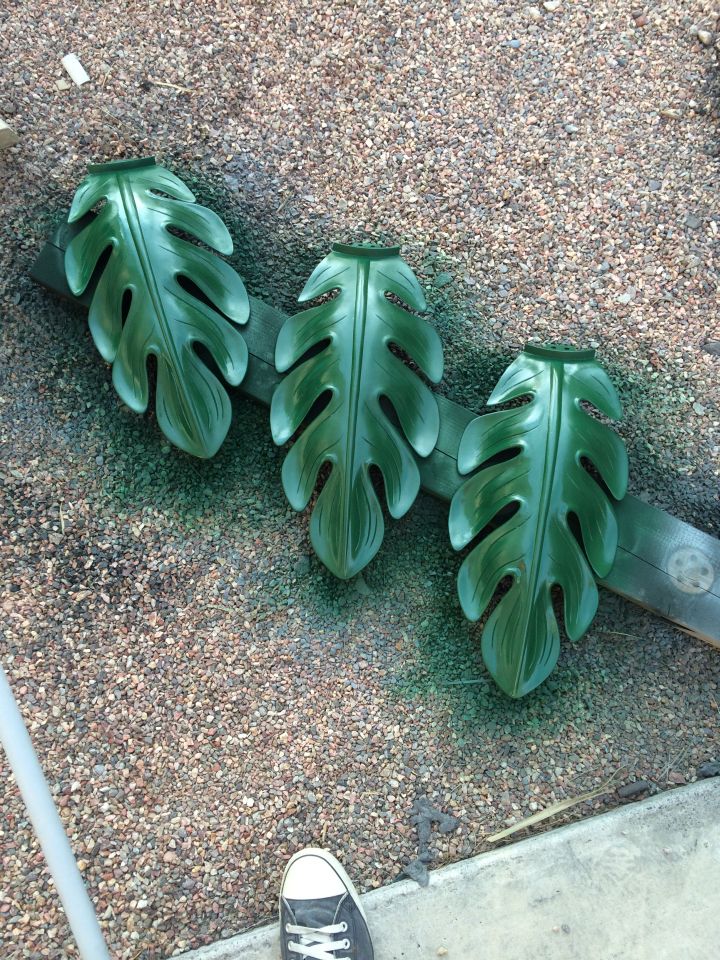
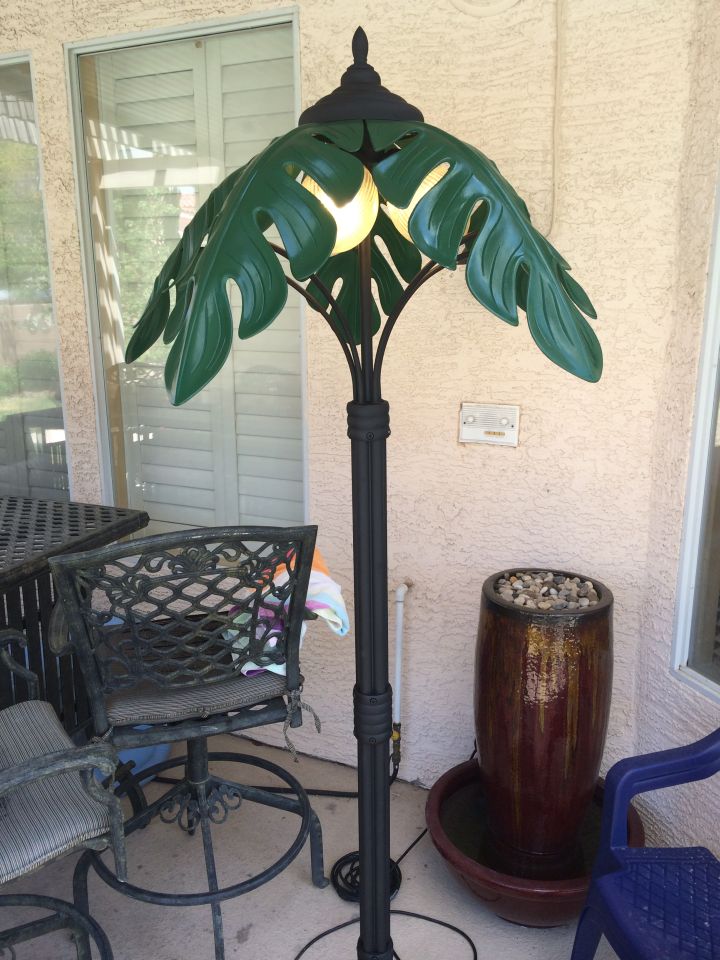
Early on while I was deciding which direction to go (To slab or not to slab. Maybe more garden space would be better…Squirrel) I was still perusing Craig’s List. I decided, if I did a cement slab, I would want to put one of those old style lamp posts on there as well so I was strolling for one of those. There were a few that were priced really well, but then I stumbled on this little gem. It may not look like much pre paint, but you have to have vision my friends. This was an all aluminum outdoor palm tree light (for $25.00), and I loved it. Carefully loaded it up as not to bend anything and off I went.
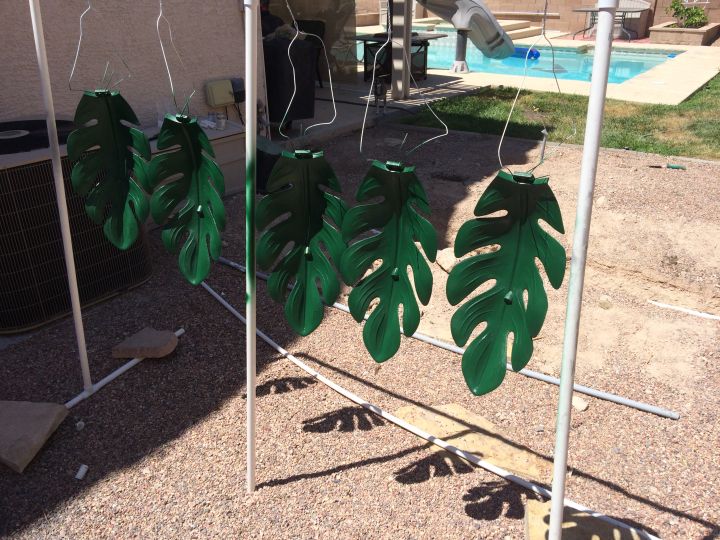
It was a bit water damaged from calcium and once I unloaded it in the garage, some of my vision started to fade, because it looked like a lot of work. You saw my hand, right? I’m not really into that kind of work. I wanted to make sure the wiring was sound though so I started tearing it down. That’s when I realized it was all aluminum. Did you know, you can’t really paint aluminum? Neither did I, this just keeps getting better. Well, once I tore into it, the wiring looked like it was a week old at most. It was absolutely perfect. I mean, now I havta try, right? So I tore it completely down to the screws and individual parts. I used a green scrub pad, a lot of elbow grease (I can’t take a picture of my elbow, but it looked a lot like my hand) and some soapy water. It cleaned up nice and the powder coating (or whatever they used on it originally) held up really well. I decided for a $25.00 investment, I’d try and paint it. I used filler primer on all of it first, then painted the leaves green. I thought they’d look better that way, rather than all black like it was.

In this picture, you’ll notice my dying grass in the background pre-removal:
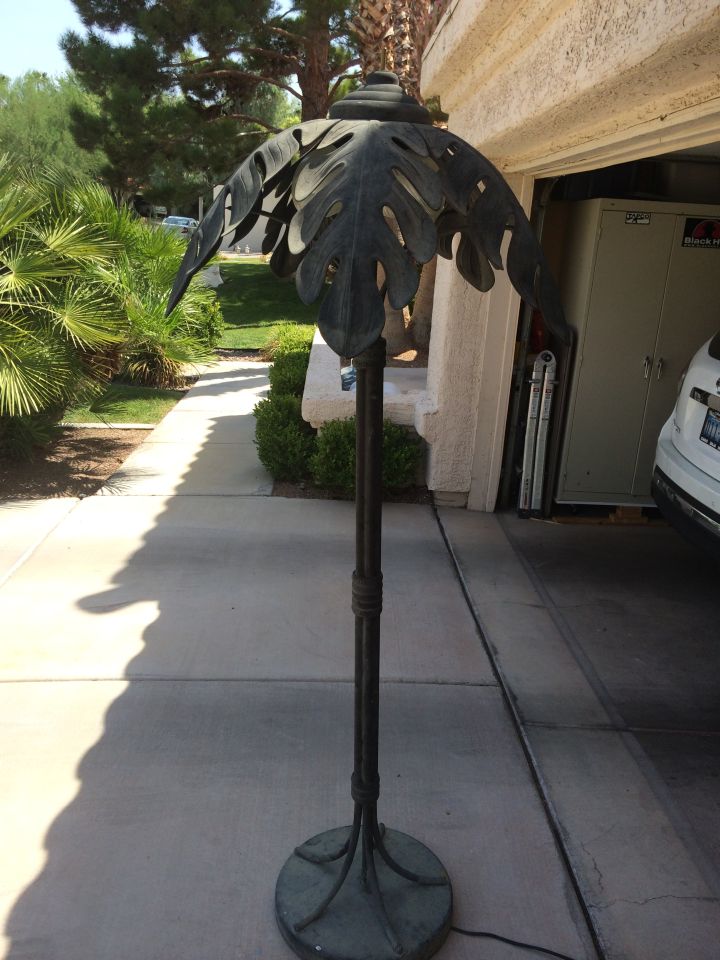
Well, here’s the finished product. I was happy with how it turned out. Total cost? $25.00 for the lamp and $15.00 for the paint $40.00
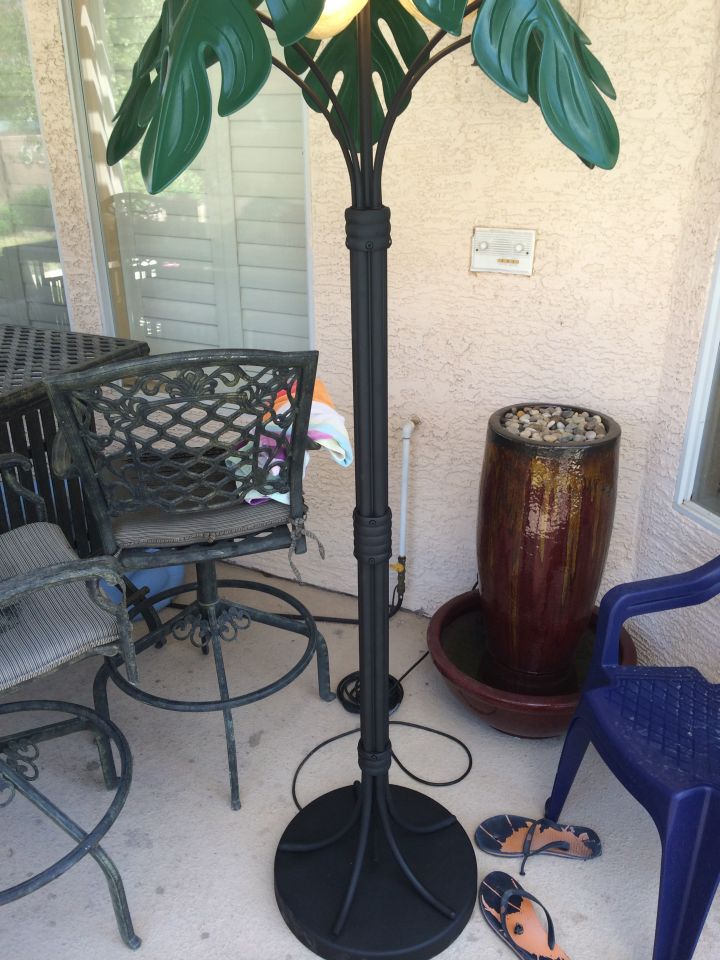
By the way, that fountain you see in the picture above? Another Craig’s List find. $40.00 and in perfect condition, with the pump. Bought it from a man that works for Nevada Power. He and his wife decided to build a larger pond in their backyard and sold this one.
Back to the work part
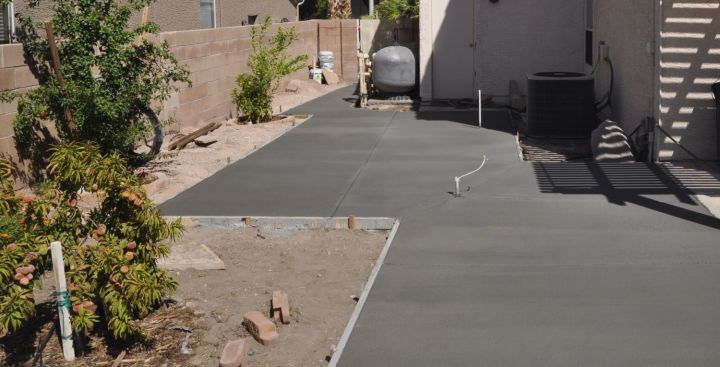
Here are some shots of the back yard once I pulled all the grass out, removed a bunch of the gravel that used to be there, buried all the conduit / PVC I ran and tried to level it out as much as possible. At this point, I’ve dropped about 10 pounds and I’m worried I’m too tired to fend off the cat if Laura was to forget to feed him seventeen times a day. He’s always looking at me and licking his paws like he’s washing up for dinner.
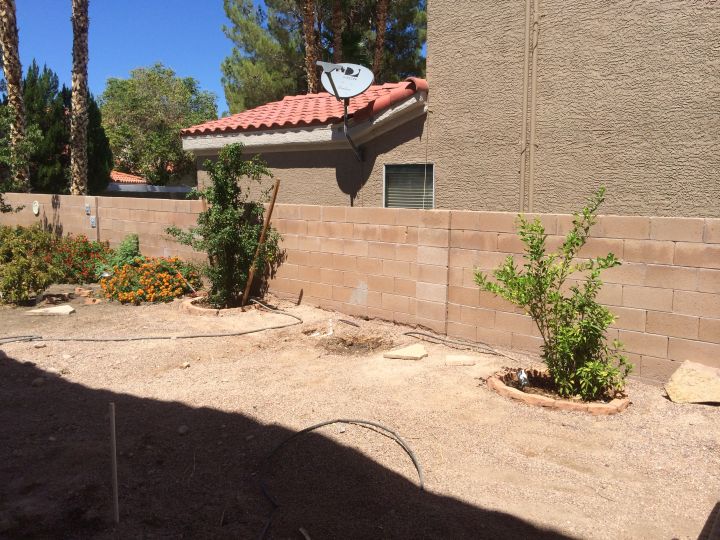

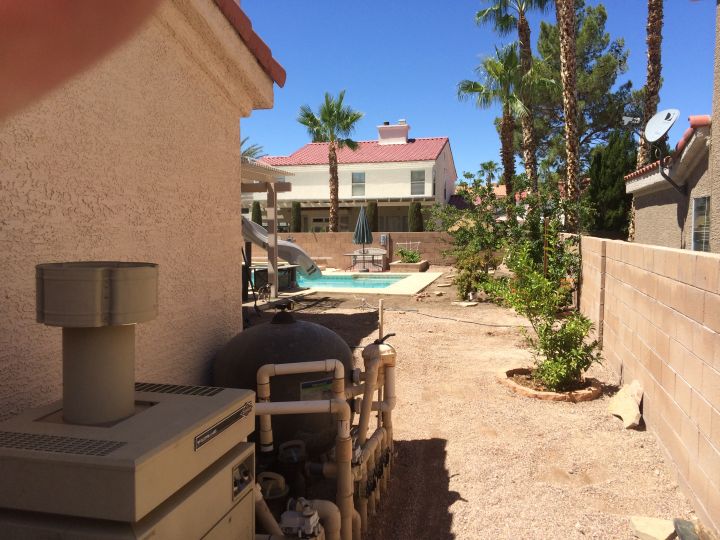
I like to call these two “Jeff learns to use a camera phone” Or, for the Kids in the Hall fans, “I’m only crushing your head”

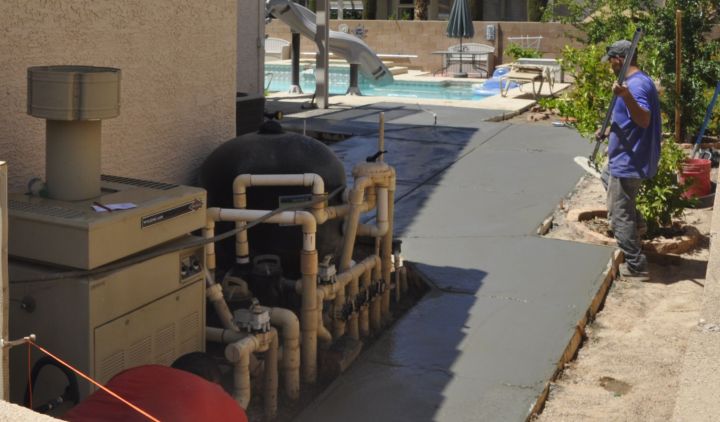
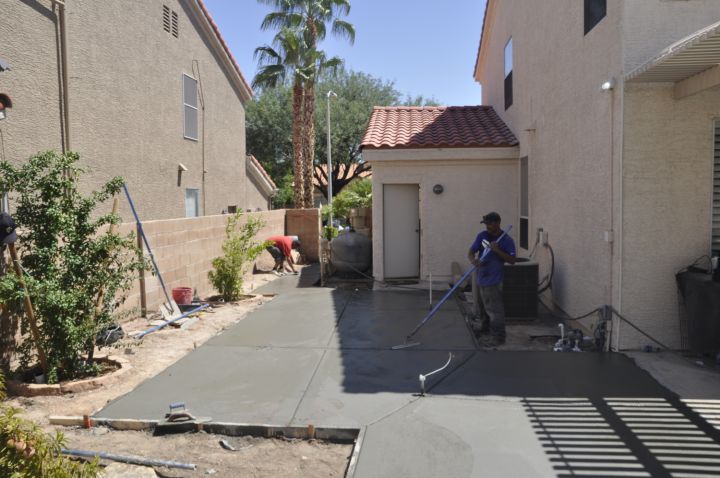
Well, at this point I’d done all I could really do and could no longer procrastinate whether to slab or not to slab. Pin pulled here we go…

Now What:
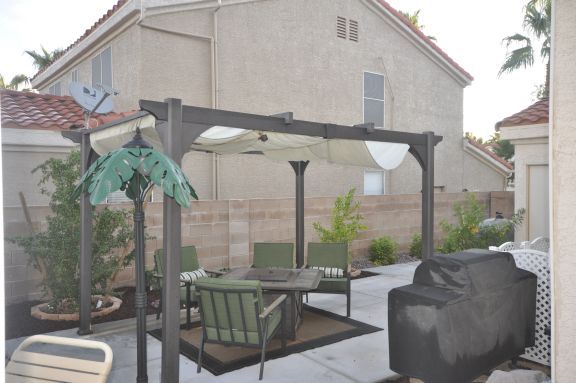
With the slab poured, it became apparent that a 10′ X 13′ Gazebo may be a bit overpowering. I had run across a Pergolas at Home Depot that we liked and decided on it. You can take a look at it here. I was literally heading in that direction to pick it up when I thought “wait, who am I? I have not checked Craig’s List yet”. Found a nice used one, looked like it may have been used for 1 season, in perfect shape. It was all disassembled, so putting it together took a couple tries. I had to use ladders to hold up one side while I worked on the other, but it was not too bad. Certainly not enough effort to pay another $300.00 plus tax.
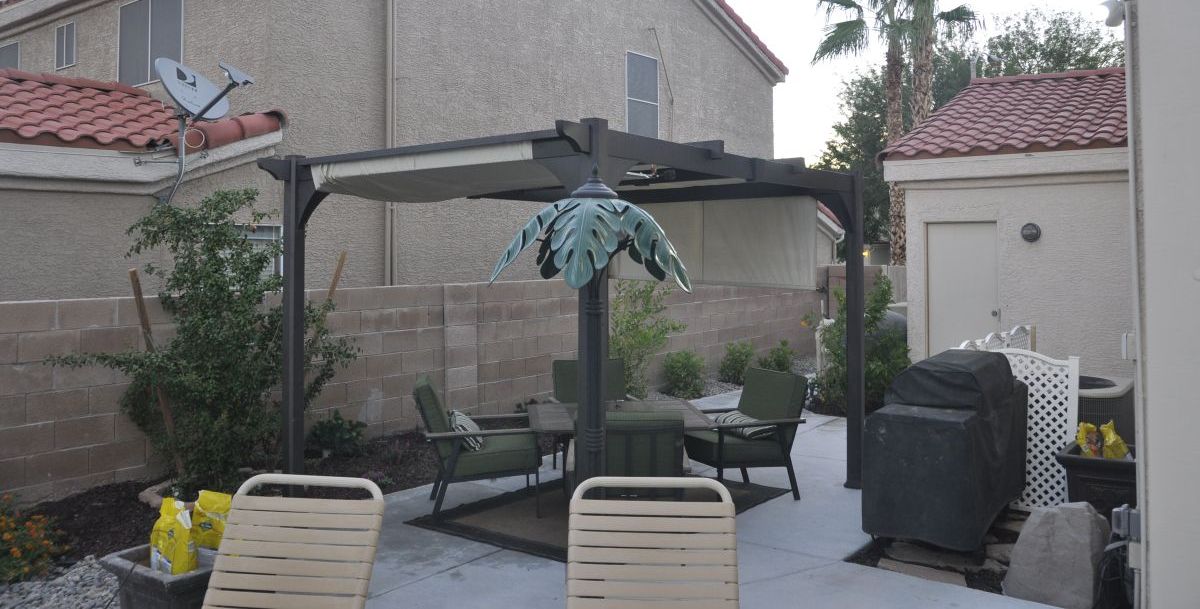
The canopy on the top will slide down either side, which is nice because our house faces East so, the sun sets to the back of our house and rises to the front. The tarp allows us to block it in the morning if we’re using the patio then, and if we’re out there in the evening, we can pull down the other side. The first wind we had beat it up a bit, so I fashioned some cable ties for it out of 1/16th stainless steel wire rope. They tuck under the support posts when we’re using it, and hold the cross bars for the tarp in place when we’re not.
This piece runs through the weigh bar at the end of the canopy.
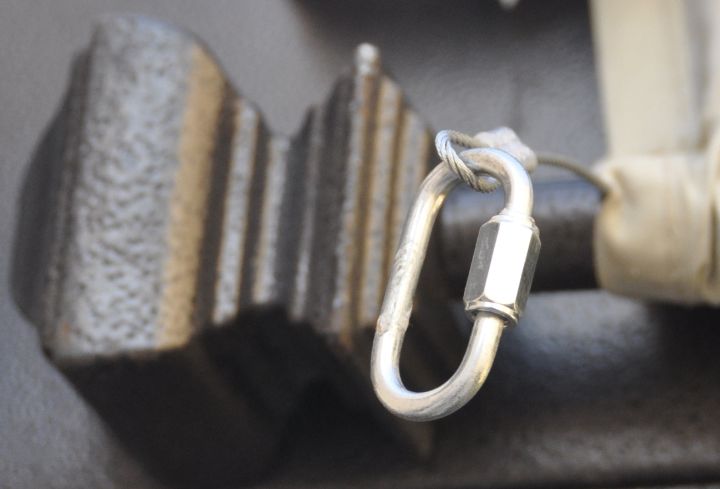
Half way down the support beams I put an I bolt in so you could fasten the weight bar in place half way down.

At the bottom, there is another cable that the weight bar can attach to so the canopy is fully extended on either side but locked in place so it can’t blow around. When not in use this cable tucks in under the support beam.

Notice the tall brown flower pot in the videos below? I figured the PVC I ran for the misters would just go to waste and look terrible if I cut it off. Thinking we would do a 10′ X 13′ gazebo, I had measured it out 13′ from the power conduit and that was 3′ away from the second support post for the 10′ pergola. I plumbed it into the sprinklers and now it’s a watered flower pot. The power conduit worked out nicely though and I was able to add a Z-Wave outlet right to the support leg of the pergola. This allows for a voice activated palm tree lamp…only in America!
I’m done now
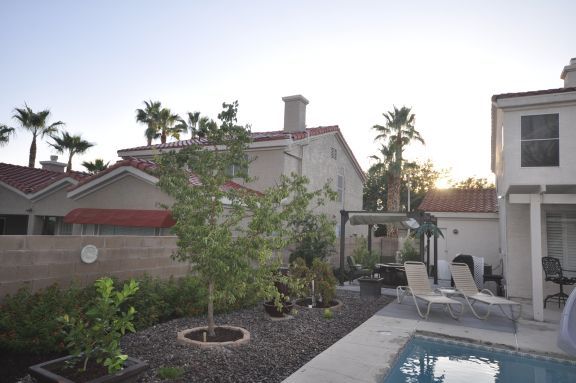
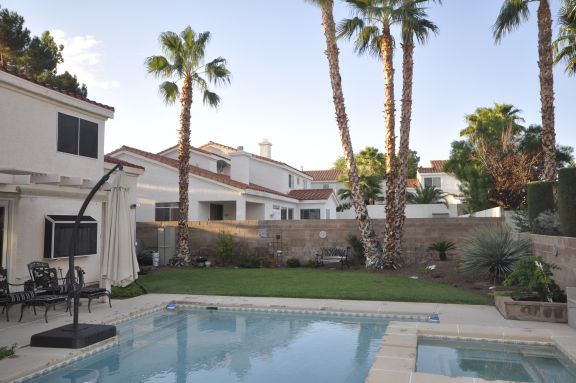
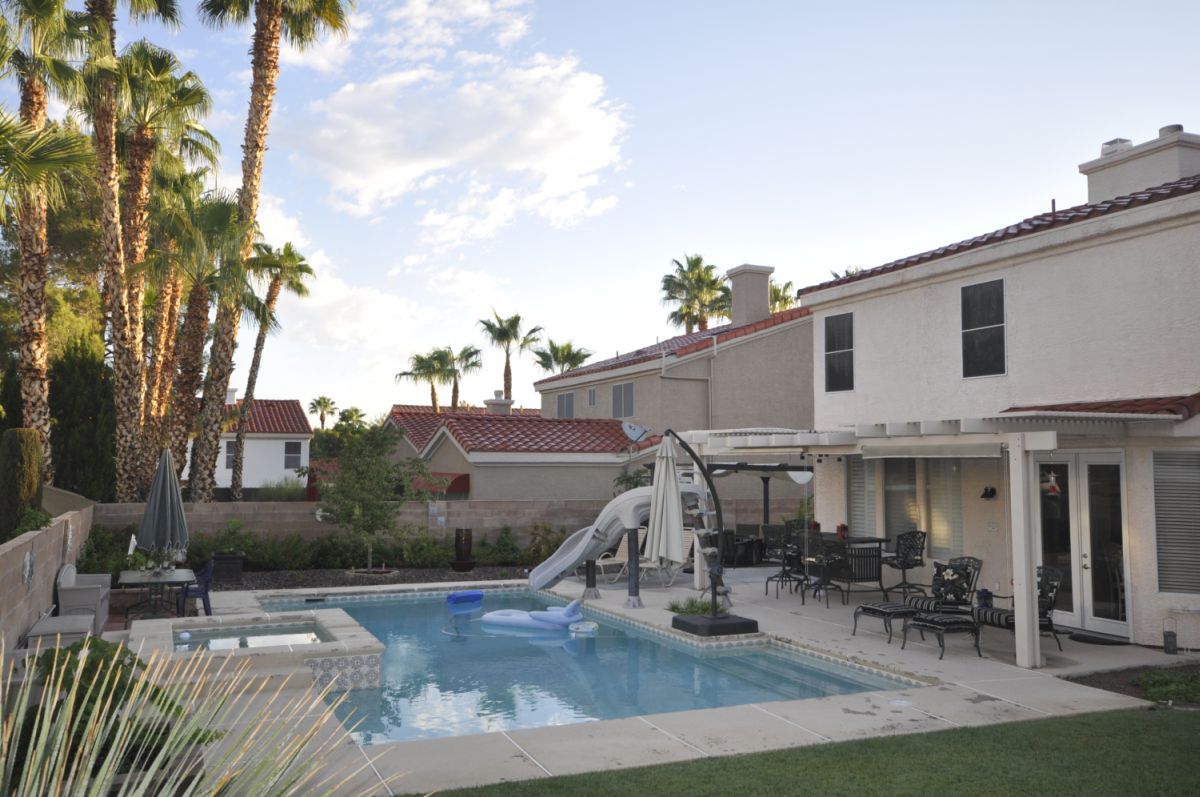
Well, here is the finished product. Overall I’m pretty happy with how it turned out, especially for the total investment. Next project will be to redo the cool decking as I’m sure you’ll notice how lovely it looks. There are a couple video walk throughs below as well.
Picked up this 11′ umbrella from CL as well for keeping the sun of any little ones who find their way to the shallow end steps
Here is a quick walk through of everything:
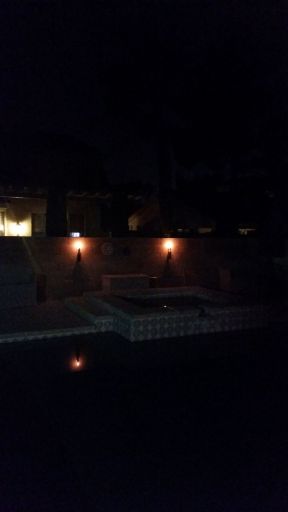
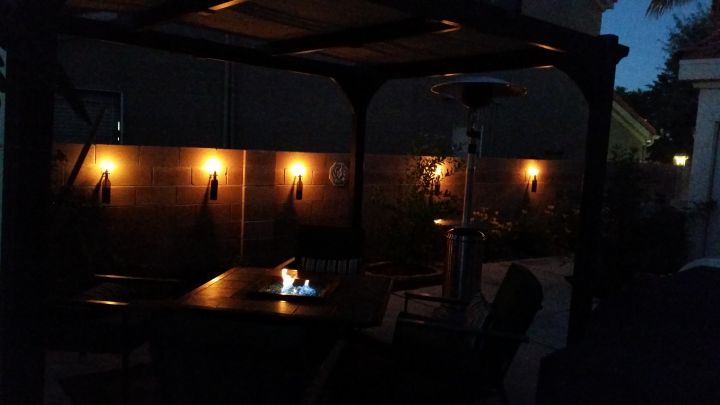
Here is a video walk through in the evening with the Tikis burning. If you have your sound up, you’ll hear the Z-Wave voice activated lights and fountain as well. I didn’t turn them on in this video, but the misters are also controlled by this same Z-Wave stuff.
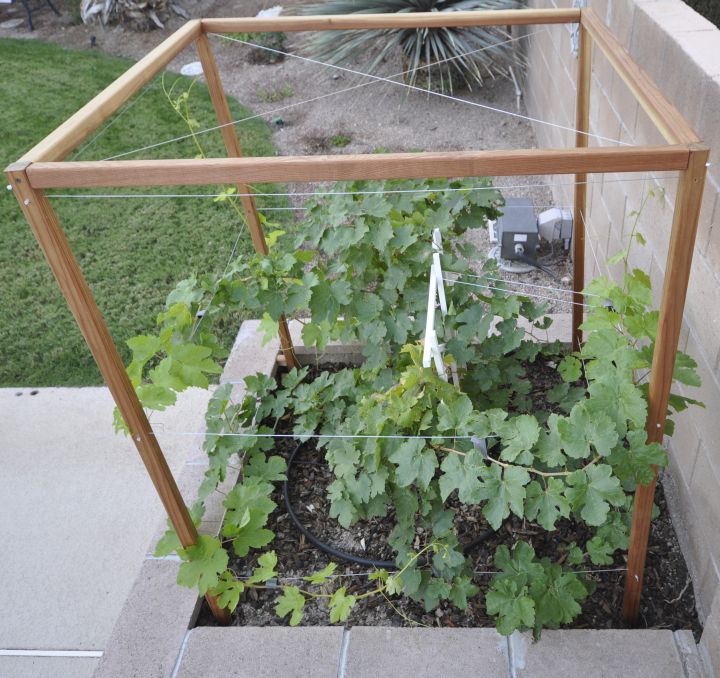
I tore out the old shrubs that were where the grapes are now. The grapes soon started to just look tweaked that they had nothing to climb on. I could almost hear them saying “that’s OK, we’ll just grow around the pool and drop grapes in…all good. Did a lot of searching and couldn’t find anything I really liked, so I just wandered around Home Depot until something jumped out at me. This was the end product. A combination of 1 3/8″ X 1 3/8″ redwood and 1/16” stainless steel wire rope.

Picked up some outdoor lights on clearance from Target and put them up inside the patio.

Dad was kind enough to give me a propane bottle for the firepit…thanks, Dad :)

While I looking for ideas (once I make my mind up whether to have a slab or just more garden space, I stumbled on a tutorial for Wine Bottle Tikis
Wine Bottle Tiki Torches
Original idea from here:
Parts:
Ceiling flange (#3 on link above) Click here for Ebay link which was the best price I found.
Split ring hanger (#4 on link above) Click here for a link to Lowes which was the best price I found.
Copper Coupling (#5 on link above) Click here for a link to Lowes price was fine and since I was there for the slip ring.
Copper slip cap 10 Pack(#6 on link above) Click here for a link to Lowes. Price was fine and since I was there for the other parts…
Threaded rod (#9 on the link above) Click here for a link to Lowes for this part. Price was fine and I was there already. They also sell this threaded rod in pre-cut 3″ lengths if you don’t want to try and cut it. As the hardware people where it is. It’s in the hardware section in the specialty drawers and sells for .68 cents each.
Wicks – (#10 on the link above) Decent deal and best reviews of everything I found. Amazon link
Torch Fuel – this was a decent deal after shopping around:
Found this on Craig’s List for $8.00 so check there first:
Here they are in action

I love fruit trees but didn’t want to flood the back yard with them so I did a few dwarf trees. All the larger pots have dwarf fruit trees in them. The Pomegranate bush and Kumquat tree have been there about a year now. The Dwarf Peach and regular Apricot tree are about 5 years old now.
Trees:
Dwarf orange Tree
Dwarf Tangerine Tree
Dwarf Lemon Tree
Dwarf Peach Tree
Lime Tree
Pomegranate Tree/Bush
Kumquat Tree
Two Grape vines
Apricot Tree
Tally Total:$2483.00, one hand and several greased out elbows
Sprinkler solenoids/valves 8 for (Craig’s List new $40.00)
Pergola (Craig’s List used, looked to be about 1 season old at most $200.00)
Firepit and chairs (Craig’s List warehouse liquidator $300.00 new with tags)
Fire glass to replace lava rock in the firepit ($30.00 Star Nursery)
Bluetooth speakers (Craig’s List used $20.00)
Z-wave ($200.00 Refurbished controller and outlets Ebay)
Umbrella (Craig’s List used $100.00)
Palm Lamp (Craig’s List used $25.00)
Patio Lights (Target Clearance $8.00)
Patio Heater with Propane Bottle (Craig’s List $70.00 used)
New cushions for existing bar and chairs ($100.00 New End of the year clearance Home Depot)
Cement slab (Local contractor $900.00)
River Rock (Vista Landscaping Henderson $100.00)
Shrubs and trees (Star Nursery and Home Depot sales $200.00)
Tiki Fuel (Craig’s List new $8.00)
Tiki Wine Bottles (about $6.00 each for bottle) 7 each $42.00
Large planters (Craig’s List $70.00 used)
Fountain (Craig’s List $40.00 used)
Outdoor Carpet for Firepit (Craig’s List $20.00)
Lattice for the A/C units (Home Depot $50.00)
Trellis type setup for the grape vines (Home Depot $60.00)
6 thoughts on “Back Yard on a Budget”